Learn how to use tags in content cards and campaigns
When building a campaign or content card, users can select a tag from a dropdown list to insert into their content or campaign. This helps to personalize the content card to the student.
Tags match the required contact file fields, as well as any additional columns on the contact file. The tags pull the student information directly into the content card, such as the student's first name.
- attribute (ex: major)
- CustomAttribute (ex:CounselorName)
- Custom Attribute (ex: Counselor Name)
- custom_attribute (ex: program_of_interest)
- Custom_Attribute (ex: Program_of_Interest)
- Custom-Attribute (ex: City-State)
- custom-attribute (ex: city-state)
- custom_ATTRIBUTE (ex: counselor_FULL)
Adding Tags to Campaigns
- Go to {school}.fullmeasure.io
- Once you've logged in, click "Campaigns"
- Select the Category you'd like to send your Campaign from (if you have more than one Category)
- Click on the + button in the bottom right add to build a new campaign. You may also click into an existing campaign to edit.

- Type in your message
- Click on the Tag arrow to pick the tag you'd like to add to the message
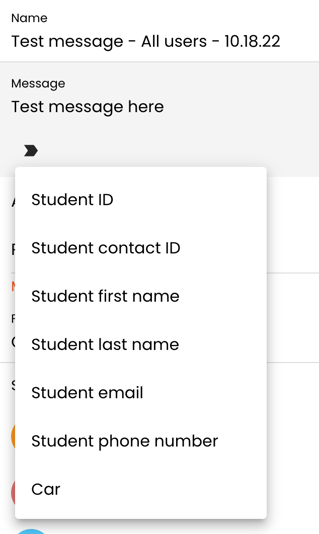
- Choose the field you want to bring into your message
- Finish composing your message
Adding Tags to a Content Card
- Go to {school}.fullmeasure.io
- Once you've logged in, click "Content" > "Cards"
- Select the Category you'd like to create your content card in (if you have more than one Category)
- Click on the + button in the bottom right add a new content card. You may also click into an existing content card to edit

- Click into the "Destination" tab
- When editing a header, subhead, body text, or letter component:
- Click on the Tag arrow to pick the tag you'd like to add to the content card text
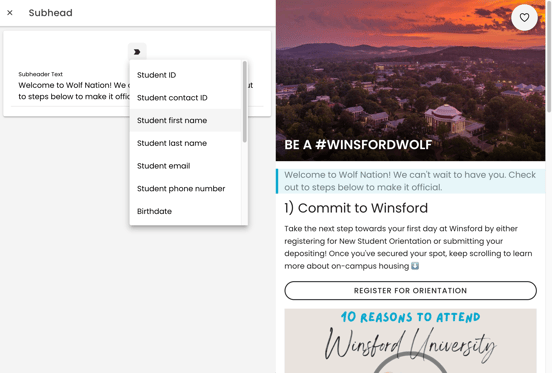
Selecting a tag
7. Choose the field you want to bring into your text
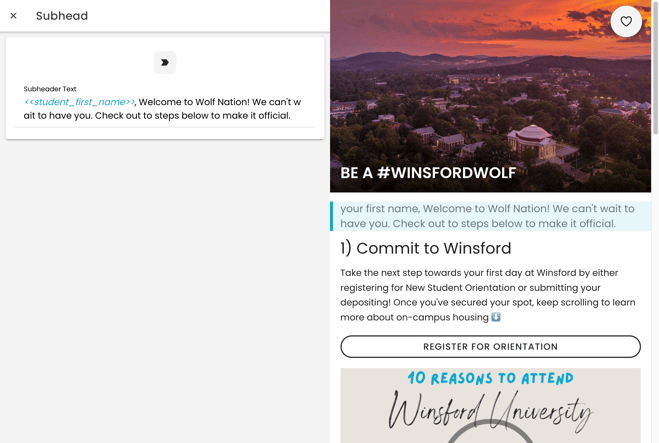
Tag displaying in content builder on left and preview on right
8. Finish composing your content card